Getting started with the Raspberry Pi - Initial Setup

The Raspberry Pi is a microcomputer with lots of packed features. You will just need to plug it into a monitor and attach a keyboard and mouse to take full advantage of the system. In this tutorial, we will go through the setup of Raspberry Pi and how to install the official Raspbian OS. (Rasbian OS has the nice user interface where you can log in and do stuff using GUI, whereas the Raspbian-Lite OS is a command line OS). You might have purchased the Rpi to learn to program, set up Home automation, Setup Pi-hole or use it as a Retro-pi for gaming. Regardless of your purpose, Make your first project to build a fully functional computer which will help you to understand all the components of the system. Then, you can proceed to build whatever you wanted to.
Things you will need
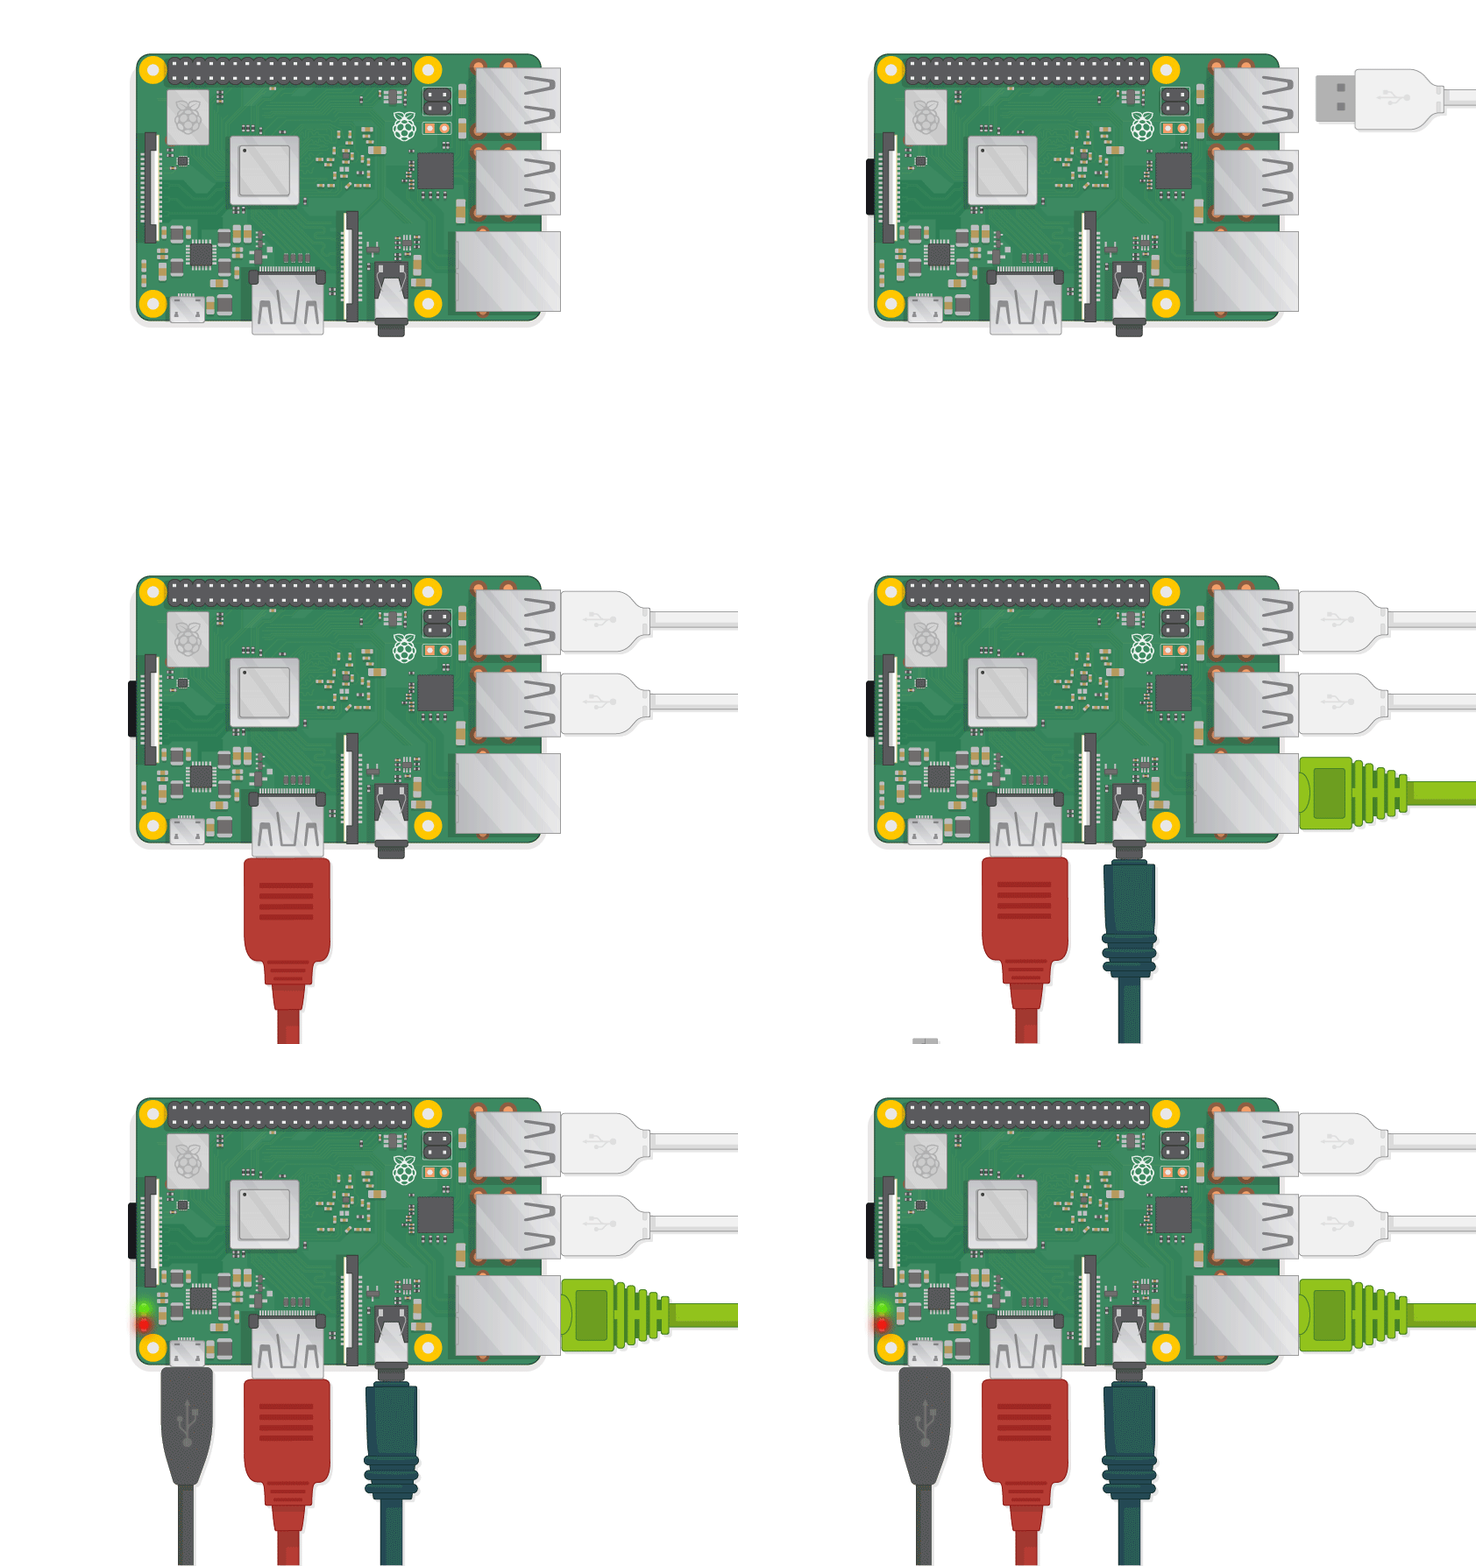
- A Raspberry Pi computer with an SD card
- A monitor with a cable (and, if needed, an HDMI adaptor)
- A USB keyboard and mouse
- A power supply
- Headphones or speakers (optional)
- An ethernet cable (optional)
- Raspbian OS, installed via NOOBS
Preparing the Operating System
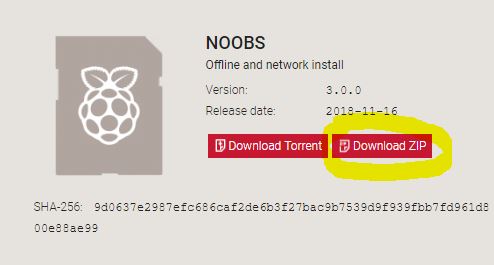
- Head over to https://www.raspberrypi.org/downloads/ and download the below file and unzip it to your desktop

- Open the unzipped folder and copy all the files and paste them to the micro sd memory card
Eject the SD card and insert it in your Raspberry Pi and plug the Pi into a power source.
Booting from NOOBS Operating System
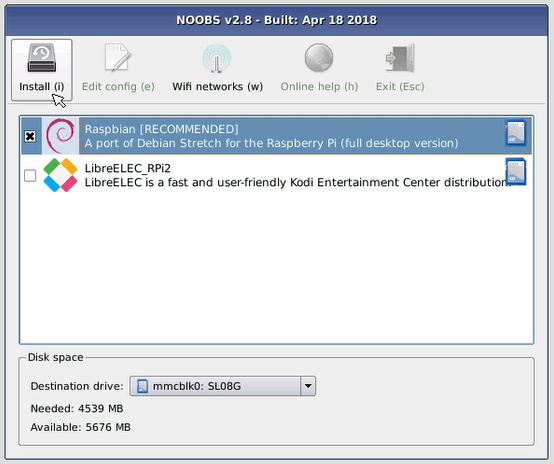
Once the Rpi boots, You will be offered a choice when the installer has loaded. You should check the box for Raspbian, and then click Install.

Click Yes at the warning dialog, and then sit back and relax. It will take a while for the Raspbian to install. Once the Raspbian OS has been installed, click OK and your Raspberry Pi will restart and Raspbian will then boot up.
Finish the setup
When you start your Raspberry Pi for the first time, the Welcome to Raspberry Pi application will pop up and guide you through the initial setup
- Set your Country, Language, and Timezone, then click Next again.
- Enter a new password for your Raspberry Pi and click Next.
- Connect to your WiFi network by selecting its name, entering the password, and clicking Next.
- Click "Next" to let the wizard check for updates to Raspbian and install them (this might take a little while).
- Click Done or Reboot to finish the setup.
Discover your new Raspberry Pi Computer
Now it’s time to take a tour of the Raspberry Pi.
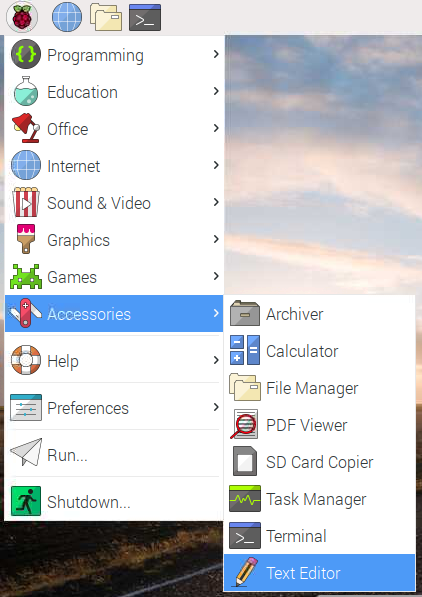
See that Raspberry up in the top left-hand corner? That’s where you access the menu: click on it, and you will find lots of applications.

Explore the pi and play around with the menu and packaged software programs and get familiar with it!
wifibeans
posted onEnjoy great content like this and a lot more !
Signup for a free account to write a post / comment / upvote posts. Its simple and takes less than 5 seconds